Posts mit dem Label packaging nets werden angezeigt. Alle Posts anzeigen

Mittwoch, 22. April 2015

Recyclingbastelidee: Frühlingsblüher // Upcycling: Blossom Branch


Draußen blüht es, da muss es drinnen auch bisschen bunter werden! Pronto! Deshalb gibt es heute ein echt schnelles und einfaches Recyclingbastelprojekt, das man auch mit zwei linken Händen hinbekommt. Und es verwertet sogar Reste, die beim Körbchenbasteln aus Obstnetzen angefallen sind. Man muss aber nicht zuerst die Körbchen nähen, man kann auch einfach mit den Blütenzweigen loslegen. 


 Anleitung (wobei es auch sehr intuitiv ist ;-) und man nicht wirklich eine Bastelanleitung braucht):

Man nehme einen Ast.
Dann schneidet man von verschiedenen Netzen die Enden ab, die mit Metallklammern zusammengehalten werden. Dabei sollte man nicht zu sparsam abschneiden, damit das Netz auch schön puschelig bleibt und man einen netten Pompom (für extra faule Bastler) bekommt.
Diese „Blüte“ klebt man dann nur noch strategisch gut platziert auf den kahlen Ast. Et voilá, fertig ist der Frühlingsblüher.

Viel Spaß!


Upcycling: Blossom Branch
Do you want to brighten your home in a few seconds? This is an easy recycling craft project for the very very lazy crafter. It is super simple and can be done in a minute.
If you sew these baskets you will end up with a few tiny pieces of mesh plastic netting which you can still turn into some nice decoration.

Tutorial (although you won't need it...)

Find a twig.
Cut off the ends of the fruit and veggie nets which are held together by metal clamps. Do not cut too short,  we want the mesh to become a nice pompom.
Now you need to glue the pompoms to the twig. Done! Now all you have to do is find a nice place for your upcycled spring decoration! Enjoy!


Donnerstag, 26. April 2012

Recyclingbasteln mit Orangennetzen: 3D Blumenkarte // Recycling Crafts: 3D Flower Card


Wieder eine kleine, schnelle und einfache (Ungeduldige oder Kinder) Bastelidee für die Recyclingbastler unter Euch, die noch Obst- oder Gemüsenetze rumliegen haben. 

Die Blume habe ich in zwei Schritten gemacht. Erst eine Schicht Kleber, dann Plastikstückchen, dann Kleber und wieder Plastik. Anschließend meherere Stunden gut durchtrocknen lassen und fertig ist die Frühlings-Sommer-Grußkarte.

Viel Spaß beim Basteln!

Weitere Netzrecycling-Anleitungen gibt es hier:


Recycling Crafts: 3D Flower Card

Here is another easy and quick crafting project tutorial for recycling crafters with a spare mesh netting.

I made the flowers in two steps. A layer of Glue, then mesh net bits, glue and net bits again. Let it dry several hours and you have got your spring- or summerthemed greeting card!

Have fun crafting!


Find more mesh netting recycling tutorials here:


The Teddy Bear Greetingcard

Donnerstag, 5. April 2012

Recycling-Basteln mit Zitronennetzen: Das Osterküken // Recycling Crafting: Mesh Netting Easter Chick


Endlich wieder Zeit für die schönen Dinge im Leben, z.B. Basteln und aus nutzlosem Plastikmüll eine süße Osterdeko zaubern.

Mein Lieblingsküken Shirley stand natürlich Modell. 


Möchtest Du auch so einen süßen kleinen gelben Freund haben? Dann musst Du nur zuerst viele saure Zitronen essen und die Netze sammeln, denn man braucht schon mehrere Netze für unser kleines Küken.

Eine kleine Warnung vorab: Das Bastelprojekt ist leicht, aber etwas unordentlich. Die kleinen Netzverpackungstückchen werden an allem kleben und überall rumfliegen. Für mehrere Wochen, trotz Staubsaugen. Aber das sollte Dich nicht abhalten.

Los geht es mit Basteln und so geht’s:

1.    Forme den Kükenkörper aus nassem Abfallpapier und lege eine Lage nasses Klopapier darum. Das ist schnelles Pappmaché. Über Nacht trocknen lassen.


2.    Die Zitronennetze in kleine 5 mm lange Schnippsel schneiden.

3.    In eine Schüssel füllen.
4.    Den trockenen Papierkörper in eine dicke Schicht Kleber hüllen.
5.    In den Netzstückchen rollen. Eventuell wiederholen.


6.    Wieder trocknen lassen.
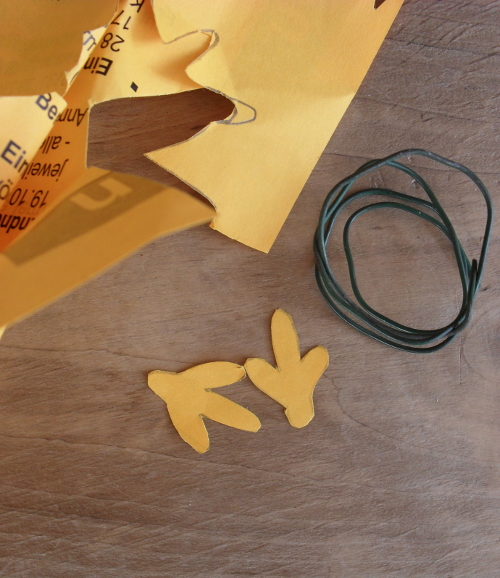
7.    Augen, Füße und Schnabel aus buntem Papierabfall ausschneiden. Locherkonfetti gibt super Augen.


8.    Mein Küken sitzt auf einer Drahtspirale, so fängt es an zu hüpfen und zu tanzen, wenn ich auf den Tisch klopfe.
Frohe Ostern!


Noch rote Netzverpackung übrig? Versuch es doch mit dieser Bastelidee!


Recycling Crafting: 

Mesh Netting Easter Chick

Time again for the pretty things in life: Crafting and turning plastic waste into cute Easter decorations.

Here is the model.

Want a sweet fella like this? Well, then you will have to eat a lot of sour lemons first to get you a nice heap of yellow mesh netting.

I have to admit this is a bit messy, as the little plastic pieces will stick to everything- everything. You will find them everywhere for weeks. But this should not keep you from crafting...

Then proceed as follows:

1.    Form the chicks body with wet paper and cover it with toilet paper. Then let it dry over night.
2.    Cut the mesh nets or lemon netting, or whatever this is called, into 5 mm long bits.
3.    Put it in a bowl.
4.    Cover the dry chick body in a thick layer of glue.
5.    Roll in yellow mesh net pieces. You might need to add glue and roll several times.
6.    Let it dry.
7.    Make eyes, feet and a beak from scraps of paper you have at hand. Hole puncher confetti works great as eyes!
8.    My little Easter chick sits on wire so when I knock on the table it starts to dance. 

 Happy Eastern!


Still got red mesh netting? Try this crafting project!

Montag, 13. Februar 2012

Recyclingbasteln mit Orangennetzen: Last-minute Valentinstag-Karte // Recycling crafting with packaging nets: Last-minute Valentine's Day Card


Mit Fell aus einem recycelten Orangennetz. Eigentlich ganz schnell und einfach zu machen. Man muss kein großer Bastler sein, damit das ein 5-Minuten-Projekt ist.


Teddybär, Igel oder irgendwas anderes zeichnen, Linien mit Kleber ausfüllen. Dann die Orangennetzstückchen daraufstreuen und trocknen lassen. Jetzt noch die Details aufmalen, ein lustiges Sätzchen und fertig ist deine fellig-flauschige Valentinstagkarte.


Overkill!


Recycling crafting with packaging nets: Last-minute Valentine's Day Card

With recycled mesh net fur. Actually quite quick to make.
Draw a teddy bear or a hedgehog or something else, fill the outlines with glue. Sprinkle orange net bits on the glue and let it dry. Add details and a message and your fury Valentine's Day Card is complete.

Freitag, 20. Januar 2012

Recyclingbasteln mit Orangennetzen: Kleine Blumenkarte // Recycling Crafting with packaging nets: Little Flower Card


Dieses Blümchen ist mit einem einzelnen Faden gestickt. Die Einstiche in der Mitte der Schlaufen habe ich einfach mit einem Locherkreis überklebt.
Ich finde, man könnte es gut als Geschenkanhänger nehmen. Man könnte auch die ganze Karte mit Orangennetzblumen besticken.
(Und ich brauche dringend eine scharfe Schere.)


 Hier gibt es die Valentinstag Bastelprojekte von letztem Jahr:

Bastelanleitung: Recycelte Herzen

Valentinstagkarte aus alten Buchseiten

Recycling- Bastelanleitung: Plastikherzen


I stitched some loops with a single thread from an orange net and topped it with a hole puncher circle. Done in two minutes. It could be a nice gift tag. Or cover a whole card in flowers.
(And I really need sharp scissors.)


The Valentine's Day projects of last year are here:


Related Posts Plugin for WordPress, Blogger...